Image Slider

Showing posts with label DIY. Show all posts

DIY: French Tip Manicure

29 May 2015
French tip manicure

I always prefer to do a french tip manicure whenever there are times that I wanted to paint my nails and kinda lazy to do a nail art but wanted to make my nails look chic and stylish. It's so easy, simple yet very elegant. Isn't it pretty?

Here is the easy step by step tutorial to guide you on how to achieve a French tip manicure.

French tip manicure

French tip manicure

1. Gather all the tools and materials needed.

Base coat ( I used Caronia kwik dry & cuticle conditioner)
White Nail polish ( I used French white by Dior)
Top Coat or clear nail polish ( I used Bobbie top coat)
Nail cutter
Nail Trimmers
Nail File
Nail buffer
Nail polish remover
Cotton Balls

French tip manicure

2. Prepare the Nails.

Wash your hands with soap and water, rinse and dry. Remove old nail polish with nail polish remover and cotton balls if there's any. Trim the nails using a nail cutter into your desired length.

French tip manicure

3. Cut and remove flakes.

Cut and remove the corners of your nail and flakes with clippers.

French tip manicure

4. Nudge Nail Beds.

Dab cuticle remover along the edges of your nails, Then use a metal flat-ended pusher, to softly ease back cuticles. and clean the insides of the nail.

French tip manicure

5. File and Shape your nails.

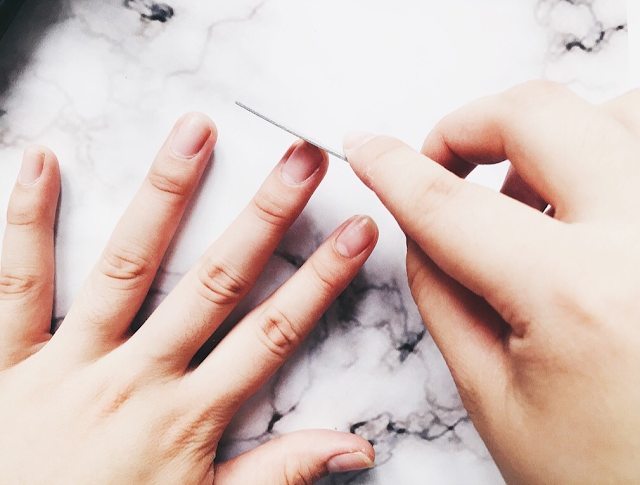
Use a nail file to smoothen each of your nails and make it into a square shape or into your preferred shape.

French tip manicure

6. Apply a base coat.

Applying a base coat is important because it protects the nail from the chemicals found in nail polishes. Paint the nail vertically, start from the cuticle to the tip, with the brush angled forward. Fill in the entire nail using smooth, even strokes. Continue painting the base coat on each nail of both hands.

Last Minute DIY Mothers Day Gift Ideas

10 May 2015


Last minute DIY Mothers Day Gift Ideas


Happy Mothers Day to all the great Mothers out there! Today we are celebrating Mothers day all over the world! Do you already have a gift to your Mom, Grandmom or Aunt? If you don't have a gift yet, here's my last minute DIY mothers day gift. It's quick, easy and very budget friendly. I hope you like it! Enjoy!


Gift #1 SPA in a JAR


Supplies:
  • Mason Jar
  • Cotton Balls
  • Manicure and Pedicure Tools
  • Nail Polishes
  • Washi tapes
  • Twine
  • Straw (optional)
  • Custom Tags

All about my DIY ombre hair

08 May 2015
DIY ombre hair

Ombre hair refers to hair color fading from dark to light, or vice versa. Instead of the color starting from the roots, it gradually becomes lighter, or darker, towards the ends. The word "ombre" in French means shadow or shade. -urban dictionary

it was August last year (2014) when I decided to get an ombre hair. Ombre hair was such a trend during that time and until today. I'm kinda experimenting on my hair during that time because I thought that my hair was dull and boring good thing that I heard about this ombre hair style so I decided to do it myself on my own hair.

I was very nervous on putting blonde color on the tips of my hair. It was a very long decision on whether I will do it or not because it's my first time to dye my hair in blonde color and I'm not sure if it will suit me. 

But then I convinced myself to do it because you know -YOLO. :D

I used H&M permanent hair color in total blonde. I did it at my friend's house. Before the hair dye application, I wear an old t-shirt and I covered myself up with an old towel. 

First I mixed the hair color solution according to the package's direction.

Next, I brushed my hair well, I make sure that there are no tangles left in my hair. I divided my hair into two sections then I divided both halves into as many sections as I wanted. At the very least, I divided each half into half again, splitting my hair into quarters.

I started the hair dye application using a hair dye brush and applied the dye from the tips up to the mid section of my hair (somewhere below my jawline). As I worked my way up I just used the remaining products from my brush to achieve the ombre effect. I make sure that I covered the entire tips of my hair and there are no spots missing.
I leave it for 45 mins as indicated in the hair dye's package direction. And covered it with a tin foil. 

After 45 mins, I rinsed it well using a conditioner. I dried it and applied the hair coloring again for the second time because I have a very dark hair color and I'm not contented on how blonde it looks. I just did the same steps as I did on the first step. Then I washed and dry my hair.

And this is the result...

Freebies! 30 Birthday Party decoration printables ♥

28 April 2015


Because it's my birthday tomorrow (April 30) I have some giveaways from me to you! :) It's a Birthday party decoration printables. If you're like me who are tight on a budget and thinking that buying decorations for birthday is kinda "fancy" then this will be the answer.

Photo Booth Props

Summer Photo Booth - free printable photography props perfect for a kids summer party! KristenDuke.com


Google Image Result for http://poptasticbride.com/blog/wp-content/uploads/2012/01/free-printable-funky-photo-booth-props.jpg


Get your Printable Lip & Mustache photo booth props free at www.foxhollowcottage.com


Cute printable photo booth props – FREE inside Toffee magazine! Such a great idea.  They should make a cricket cartridge with photo props...


Free Happy Birthday Photo Booth Props at kristenduke.com


Custom Post Signature

Custom Post  Signature